The Oxides of Nitrogen (NOx) sensor is a critical component in modern diesel vehicles equipped with Selective Catalytic Reduction (SCR) systems. When it fails, it can trigger poor performance, rough idling, and even costly engine damage. In this guide, you'll learn how to test a NOx sensor using both a diagnostic scanner and a multimeter — and what to do next based on your findings. A faulty NOx sensor causes rough idling, jerky acceleration, and increased emissions Common failure causes: soot build up and heat damage Diagnostic scanners can read fault codes P2200–P2225 to pinpoint issues A multimeter test can determine if the sensor module or probe has failed Replacing the sensor is often the solution, but other sensors may also be at fault What Is a NOx Sensor and How Does It Work? A NOx sensor measures the amount of nitrogen oxides in a vehicle's exhaust stream. It sends real time data to the SCR (Selective Catalytic Reduction) system, which injects Diesel Exhaust Fluid (DEF) to convert harmful NOx into harmless nitrogen and water. There are typically two NOx sensors in a diesel SCR system: | Sensor | Location | Function | | | | | | Upstream NOx Sensor | Before the SCR catalyst | Measures raw engine out NOx levels | | Downstream NOx Sensor | After the SCR catalyst | Monitors post treatment NOx to verify SCR efficiency | Why a Faulty NOx Sensor Matters A malfunctioning NOx sensor can cause: Rough idling — The ECU receives incorrect data and adjusts fuel/air mixture improperly Jerky acceleration — Inconsistent sensor readings lead to erratic throttle response Increased emissions — Without accurate NOx data, the SCR system cannot optimize DEF injection Failed emissions testing — Excessive NOx output will cause a test failure Reduced fuel economy — The engine management system operates in a compromised state Ignoring a faulty NOx sensor can lead to more serious issues, including damage to the SCR catalyst or DPF (Diesel Particulate Filter), resulting in costly repai…
How to Test a NOx Sensor: Complete Step-by-Step Diagnostic Guide?
Proformanceusa Diagnostics
April 27, 2026
The Oxides of Nitrogen (NOx) sensor is a critical component in modern diesel vehicles equipped with Selective Catalytic Reduction (SCR) systems. When it fails, it can trigger poor performance, rough idling, and even costly engine damage.
In this guide, you'll learn how to test a NOx sensor using both a diagnostic scanner and a multimeter — and what to do next based on your findings.
Key Takeaways
- A faulty NOx sensor causes rough idling, jerky acceleration, and increased emissions
- Common failure causes: soot build-up and heat damage
- Diagnostic scanners can read fault codes P2200–P2225 to pinpoint issues
- A multimeter test can determine if the sensor module or probe has failed
- Replacing the sensor is often the solution, but other sensors may also be at fault
What Is a NOx Sensor and How Does It Work?
A NOx sensor measures the amount of nitrogen oxides in a vehicle's exhaust stream. It sends real-time data to the SCR (Selective Catalytic Reduction) system, which injects Diesel Exhaust Fluid (DEF) to convert harmful NOx into harmless nitrogen and water.
There are typically two NOx sensors in a diesel SCR system:
| Sensor | Location | Function |
|---|---|---|
| Upstream NOx Sensor | Before the SCR catalyst | Measures raw engine-out NOx levels |
| Downstream NOx Sensor | After the SCR catalyst | Monitors post-treatment NOx to verify SCR efficiency |
Why a Faulty NOx Sensor Matters
A malfunctioning NOx sensor can cause:
- Rough idling — The ECU receives incorrect data and adjusts fuel/air mixture improperly
- Jerky acceleration — Inconsistent sensor readings lead to erratic throttle response
- Increased emissions — Without accurate NOx data, the SCR system cannot optimize DEF injection
- Failed emissions testing — Excessive NOx output will cause a test failure
- Reduced fuel economy — The engine management system operates in a compromised state
Important
Ignoring a faulty NOx sensor can lead to more serious issues, including damage to the SCR catalyst or DPF (Diesel Particulate Filter), resulting in costly repairs.
Common Causes of NOx Sensor Failure
Understanding why NOx sensors fail helps you diagnose the root cause more efficiently. The two most common failure modes are:
1. Soot Build-Up
Over time, carbon soot accumulates on the sensor probe, insulating it from the exhaust stream. This prevents accurate readings and eventually causes the sensor to fail entirely. Soot build-up is especially common in vehicles that frequently operate under light load or in stop-and-go traffic.
2. Heat Damage
NOx sensors are exposed to extreme exhaust temperatures. Thermal stress can damage the internal electronics or the sensor probe itself. Heat damage is more common in high-mileage vehicles or those used for heavy towing.
Is it the sensor probe or the control module that has failed?
Determining which component has failed is a crucial first step. The probe detects the chemical composition of the exhaust, while the sensor module processes and relays that data to the SCR system. A methodical testing approach will tell you exactly where the problem lies.
Step 1: Scan for Diagnostic Trouble Codes (DTCs)
Before any physical testing, use an OBD-II diagnostic scanner to check for stored fault codes. A professional-grade scan tool like the NoxSensorTester can communicate directly with the engine ECU to retrieve NOx sensor-specific codes.
Common NOx Sensor Fault Codes
| Fault Code | Description | Likely Cause |
|---|---|---|
| P2200 | NOx Sensor Circuit Malfunction (Bank 1) | Wiring or sensor failure |
| P2201 | NOx Sensor Circuit Range/Performance | Degraded sensor response |
| P2202 | NOx Sensor Circuit Low Input (Bank 1) | Short circuit or sensor fault |
| P2203 | NOx Sensor Circuit High Input (Bank 1) | Open circuit or wiring issue |
| P2213 | NOx Sensor Circuit (Bank 2) | Secondary sensor circuit fault |
| P2225 | NOx Sensor Heater Control Circuit | Heater element failure |
Pro Tip
Fault codes P2200 through P2225 are the range most commonly associated with NOx sensor issues. If you see codes in this range, proceed with the physical tests below to confirm the root cause.
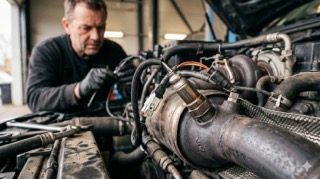
Step 2: Visual Inspection
A thorough visual inspection can reveal obvious problems before you break out the tools:
- Check the wiring harness — Look for frayed wires, corrosion at the connector, or signs of melting from exhaust heat exposure
- Inspect the sensor probe — Remove the sensor and check for heavy soot deposits or physical damage
- Examine the mounting location — Ensure the sensor is properly seated and the threads are not damaged
Note
Many NOx sensor failures are caused by wiring issues rather than the sensor itself. A damaged harness is much cheaper to repair than a sensor replacement.
Step 3: Test the NOx Sensor with a Multimeter
If the visual inspection doesn't reveal an obvious fault, proceed with electrical testing using a digital multimeter.
What You'll Need
- Digital multimeter (capable of reading voltage and resistance)
- Vehicle wiring diagram for the NOx sensor
- Oscilloscope (for CAN bus testing — optional but recommended)
Procedure
Step 3.1: Identify the Wiring
Consult the wiring diagram for your specific vehicle to identify which wires serve which function:
- Power supply wires — Typically 12V supply and ground
- CAN bus wires — CAN High and CAN Low for data transmission
- Heater circuit wires — Power and ground for the internal sensor heater
Step 3.2: Test the Power Supply
Set your multimeter to DC voltage mode:
- Turn the ignition to the ON position (engine off)
- Probe the power supply pin and ground pin on the sensor connector
- You should read 12V (nominal) — if not, there may be a wiring or fuse issue
Step 3.3: Test the Heater Circuit
Set your multimeter to resistance (ohms) mode:
- Identify the heater circuit pins from the wiring diagram
- Measure resistance across the heater circuit
- Typical values range from 2 to 10 ohms (consult your vehicle specifications)
- An open circuit or very high resistance indicates a failed heater element
Step 3.4: Test the CAN Bus Communication
For CAN bus testing, an oscilloscope provides the most accurate results:
- Connect the oscilloscope probes to CAN High and CAN Low wires
- With the engine running, look for clean square wave signals
- CAN High should read approximately 2.5V to 3.5V
- CAN Low should read approximately 1.5V to 2.5V
- If the CAN signals are missing or distorted, the sensor module or wiring may be faulty
Interpreting Your Test Results
Once you've completed the tests, use this decision framework to determine the next step:
If the Sensor Module Fails Electrical Tests
Replace the NOx sensor module. If the power supply is present but the heater circuit shows an open, or the CAN signals are missing, the module electronics have failed. Complete sensor and module replacement is typically the recommended solution.
If the Module Passes but Faults Persist
The probe itself may be the problem. If all electrical tests pass — power is present, the heater circuit is intact, and CAN communication is normal — but fault codes remain, the sensor probe has likely degraded. Soot build-up or thermal damage can make the probe unresponsive even when the electronics are functional.
If Everything Tests Good
Look elsewhere in the system. If the NOx sensor, module, and wiring all check out but the vehicle still exhibits symptoms, consider testing:
Next Steps
- Oxygen (O2) sensor — A faulty O2 sensor can mimic NOx sensor symptoms
- Mass Air Flow (MAF) sensor — Incorrect airflow readings affect the entire fueling strategy
- EGR valve — A stuck EGR valve alters exhaust composition and triggers false NOx readings
- SCR system — DEF quality, injector blockage, or pump failure can trigger NOx-related codes
NoxSensorTester: The Professional Diagnostic Solution
For technicians who need a dedicated solution, the NoxSensorTester provides rapid, accurate NOx sensor diagnostics without relying on generic scan tools.
Frequently Asked Questions
What is the most common cause of NOx sensor failure?
Soot build-up and heat damage are the two most common causes. Soot accumulates on the probe over time, insulating it from the exhaust stream, while extreme exhaust temperatures can damage the internal electronics.
Can I drive with a faulty NOx sensor?
While you can technically drive with a faulty NOx sensor, it is not recommended. The vehicle will likely experience reduced performance, increased emissions, and potentially damage other emission control components. The check engine light will also be illuminated.
How much does a NOx sensor replacement cost?
NOx sensor replacement typically costs between $200 and $600 including parts and labor, depending on the vehicle make and model. The sensor itself ranges from $100 to $400.
How long does a NOx sensor last?
NOx sensors typically last 50,000 to 100,000 miles, though this varies significantly based on driving conditions, exhaust temperatures, and maintenance habits.
Will a NOx sensor fault clear itself?
NOx sensor fault codes will not clear on their own. Even if the underlying issue is resolved, the codes must be cleared with a diagnostic scanner. If the fault is intermittent, the code may disappear temporarily but will return until the root cause is fixed.
What is the difference between upstream and downstream NOx sensors?
The upstream NOx sensor measures raw engine-out emissions before the SCR catalyst, while the downstream sensor monitors post-treatment levels to verify SCR efficiency. Both work together to optimize DEF injection.
Summary
Testing a NOx sensor is a methodical process that combines electronic diagnostics with physical inspection:
- Start with a diagnostic scan to read fault codes in the P2200–P2225 range
- Perform a visual inspection of wiring, connectors, and the sensor probe
- Use a multimeter to test power supply, heater circuit resistance, and CAN bus signals
- Interpret results to determine whether the sensor, module, or another component is at fault
Bottom Line
A systematic approach to NOx sensor testing saves time and money. Start with the simplest checks — fault codes and visual inspection — before moving to electrical testing with a multimeter. When replacement is needed, choose quality components and clear all fault codes after installation to ensure proper system reset.
Next Steps: Ready to diagnose a NOx sensor issue? Browse our NoxSensorTester diagnostic tools or contact our support team for expert guidance.
Stay Updated
Get more articles like this and product updates delivered right to your inbox.
We respect your privacy. Unsubscribe at any time.
Featured Articles
View All
Best Heavy-Duty Truck Diagnostic Tool in 2026: What to Look For
DPF Regeneration Problems: Clean, Replace, or Diagnose
A practical 2026 guide to DPF regeneration problems, soot load, ash load, failed regens, sensor faults, and when to clean or replace a DPF

How to Read Diesel Fault Codes Like a Pro
A practical guide to understanding SPN/FMI fault codes, what they mean, and how to use a diagnostic scanner to pinpoint issues fast.